Vegetable Soil and Nutrient Management: Growing a Healthy Garden
Imagine planting your favorite vegetable seeds with all the care and love in the world, only to watch them sprout or, even worse, not at all. The secret behind a lush, bountiful garden lies beneath our feet, in the ground that cradles our seeds. This guide will delve deep into vegetable soil and nutrient management.
By the end of this read, you will know how to create a garden environment where your vegetable crops survive and thrive! So stick around if you're a seasoned gardener aiming for the next level or a newbie still figuring out how to convert that patch of land into a vegetable oasis. You’re about to embark on a transformative journey that could turn your garden into the talk of the town—or at least make those salads a lot more exciting!
Ready to dig in? Let’s turn that dirt under your fingernails into a badge of honor.
Importance of Healthy Soil
1. Nutrient Supply
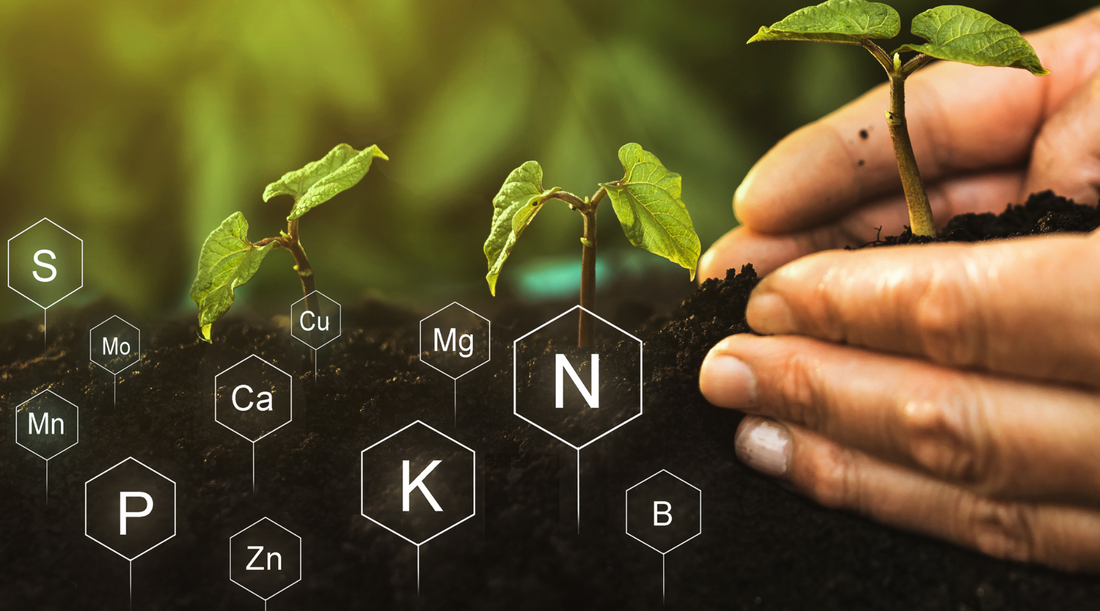
One of the primary roles of healthy soil is to act as a reservoir of nutrients essential for plant growth. Nutrients like nitrogen, phosphorus, and potassium increse soil nutrient levels which are vital for various plant functions such as growth, flowering, and increase crop yeild. Healthy soil ensures a consistent and balanced supply of these and other nutrients, providing a favorable environment for vegetable plants to grow and thrive.
2. Water Retention and Drainage
The physical structure of healthy soil plays a critical role in water management. Good soil retains moisture well, allowing plants to access water when needed. At the same time, it also provides adequate drainage, preventing waterlogged conditions that could lead to root rot or other diseases. Water is essential for photosynthesis and nutrient uptake, making soil’s role in water management critical for vegetable plants.
3. Disease Resistance and Pest Control
Healthy soil is teeming with microorganisms that form a complex ecosystem. Many of these microbes are beneficial and can help suppress diseases and deter pests. For instance, certain fungi form symbiotic relationships with plant roots, aiding in nutrient absorption and enhancing disease resistance. Others can produce natural antibiotics that deter harmful pathogens. A balanced soil ecosystem contributes to robust plant health, reducing the need for chemical pesticides and fungicides.
4. Root Support and Anchorage
The physical properties of healthy soil, including its texture and structure, offer optimal support for root growth. Well-structured soil enables roots to penetrate deeply and spread out, providing strong anchorage and access to a larger soil volume for nutrient and water absorption. This robust root system is significant for most vegetable crops that bear heavy fruits and require stability.
5. Environmental Sustainability
Healthy soil is not just good for plants but also for the environment. Practices that maintain and improve soil health, such as organic farming and crop rotation, often result in less erosion and better water quality. Additionally, healthy soil can act as a carbon sink, capturing carbon dioxide from the atmosphere and mitigating the impact of climate change.
How to Keep Your Garden Soil Healthy
Soil Testing and pH Adjustment
Soil testing is like getting a health check-up for your garden. It provides essential information about the soil pH level and nutrient content. This knowledge helps you make informed decisions about fertilization and soil adjustments.
Sometimes, you may need to adjust your soil pH to create an ideal vegetable environment. Lime can raise pH levels in acidic soil, while sulfur can lower pH in alkaline soil. Precise adjustments ensure your plants can absorb nutrients effectively.
Composting for Healthy Soil
Composting is akin to magic for your garden soil. It's a process that transforms kitchen scraps, yard waste, and other organic matter into nutrient-rich humus. Humus improves soil structure, aeration, and moisture retention. When incorporated into your garden, compost enhances fertility and supports beneficial microorganisms.
Remember adding compost to your soil can increase soil organic matter and improve soil health and fertility, too much compost can cause problems for the health of your plants and the environment.
Creating a compost pile is relatively simple. Start with a mix of brown materials (such as dried leaves) and green materials (like kitchen scraps). Turn the pile regularly to provide oxygen for decomposition. In a few months, dark, crumbly compost will be ready to enrich your garden soil.
Easy Steps in Creating a Compost
Turning kitchen scraps and yard waste into nutrient-rich compost is like alchemy for your garden. Composting is an environmentally friendly way to recycle organic matter and rewards you with a valuable end product that can significantly enhance the health and fertility of your soil. Here's how to make your own compost pile in easy steps:
1: Choose the Right Location
Select a spot in your yard that is well-drained and easily accessible. You can place your compost pile directly on the ground or use a compost bin for a neater appearance and easier management.
2: Gather Your Materials
You'll need both 'green' and 'brown' materials for a balanced compost pile:
- Green Materials: Kitchen scraps like fruit and vegetable peels, coffee grounds, and eggshells. Grass clippings and garden waste also fall into this category.
- Brown Materials: Dry leaves, straw, shredded newspaper, cardboard, and small twigs.
Note: Avoid adding meat, dairy, oily foods, or pet waste, as these can attract pests and cause odors.
3: Lay the Foundation
Start by laying a layer of coarse brown materials like small twigs or straw at the bottom. This layer, which should be about 4-6 inches thick, helps in drainage and aeration.
4: Build Your Pile
Now, alternate layers of green and brown materials. A good rule of thumb is to have a ratio of 3 parts brown to 1 part green. Each layer should be about 2-4 inches thick.
5: Keep it Moist
Your compost pile should be as damp as a wrung-out sponge. Water the pile lightly as you add new layers or during dry spells to maintain moisture.
6: Turn and Monitor the Pile
Aerate your compost pile by turning it with a shovel or compost fork every week or two. This introduces oxygen into the pile, which is essential for decomposition.
The composting process typically takes a few weeks to a few months, depending on the materials used and the weather conditions. You'll know your compost is ready when it looks, feels, and smells like dark, crumbly soil rather than rotting vegetables and leaves.
7: Harvest and Use Your Compost
Once your compost is ready, remove the finished compost from the bottom of your pile, not disturbing the newer, undecomposed material at the top. Use your fresh compost to enrich your garden soil, as a mulch, or as a component in potting mixes.
Troubleshooting:
- If your compost smells bad or is attracting pests, it may be too wet or contain too many green materials. Add more brown materials and turn them to improve aeration.
- If it's not decomposing, it may lack nitrogen. Add more green materials.
Organic Fertilizers and Amendments
Organic fertilizers are derived from natural sources like bone meal, fish emulsion, volcanic rocks, and compost. Unlike synthetic fertilizers, they release nutrients slowly, preventing nutrient leaching and promoting long-term soil health. Organic amendments, such as compost, volcanic rock dust, and aged manure, enhance soil structure and nutrient content.
Selecting the appropriate organic fertilizer depends on your plants' needs. Some vegetables thrive with high nitrogen sources, while others prefer phosphorus-rich options. Understanding your garden's requirements ensures robust, healthy growth.
Fertilizing and Amending Your Soil
1. Determine Nutrient Needs:
- Review the soil test results to identify any nutrient deficiencies or imbalances. Different plants have specific nutrient requirements, so tailor your amendments accordingly.
2. Choose the Right Fertilizer:
- Select a fertilizer that matches your plants' needs based on the soil test results. Commercial fertilizers are typically labeled with three numbers, indicating the percentage of nitrogen (N), phosphorus (P), and potassium (K) they contain. For example, a balanced fertilizer might be labeled 10-10-10.
3. Apply Fertilizer Properly:
- Follow the recommended application rates on the fertilizer package. Avoid over-fertilizing, as excessive nutrients can harm plants and leach into groundwater.
- Distribute the fertilizer evenly over the soil surface around the plants. Water thoroughly after application to help nutrients reach the root zone.
4. Time Your Fertilization:
- Fertilize your plants at the appropriate times during their growth cycle. Many gardeners apply fertilizer in early spring to kickstart plant growth and sustain it again in late spring or early summer.
5. Incorporate Organic Amendments:
- For specific soil problems, consider organic amendments like gypsum for improving clay soil drainage or sulfur to lower pH in alkaline soil.
6. Compost Tea and Liquid Fertilizers:
You can use compost tea or liquid organic fertilizers to boost your plants' nutrients if desired. These can be applied as foliar sprays or directly to the root zone.
Remember that soil fertility is one of the most important elements influencing crop yield which is why proper fertilizing is crucial.
Mulching to Conserve Moisture and Suppress Weeds
Mulching serves as a multitasking hero in your garden. It conserves moisture by reducing evaporation, keeping the soil consistently damp. Additionally, mulch acts as a weed suppressant, reducing the competition for nutrients and sunlight in your garden.
How to Mulch Your Vegetable Garden
Mulching your vegetable garden is a beneficial practice that helps conserve moisture, control weeds, regulate soil temperature, and improve soil health. Here's a step-by-step guide on how to mulch your vegetable garden effectively:
- Gather Your Mulch Material:
- Choose organic mulch material for your vegetable garden. Common options include:
- Straw: Straw mulch is excellent for vegetable gardens. It's readily available, affordable, and helps retain moisture.
- Wood Chips: Wood chip mulch provides excellent weed control and decomposes slowly. Avoid using fresh wood chips, as they can tie up nitrogen in the soil during decomposition.
- Grass Clippings: If using grass clippings as mulch, make sure they're from untreated lawns and not sprayed with herbicides or pesticides.
- Compost: Well-aged compost can also be used as mulch to add nutrients to the soil as it breaks down.
- Prepare the Soil:
- Before applying mulch, prepare the soil by weeding and watering it thoroughly. This ensures that the mulch doesn't trap weeds or block water from reaching the roots.
- Apply Mulch:
- Spread a layer of mulch evenly around your vegetable plants. Aim for a thickness of 2 to 4 inches (5 to 10 cm) of mulch. Be careful not to pile mulch against plant stems, as this can lead to rot and disease. Leave a small gap around the stems.
- Maintain a Weed-Free Edge:
- Create a weed-free border around your vegetable beds by pulling weeds and maintaining a clean edge. This prevents weeds from encroaching from the surrounding area.
- Replenish as Needed:
- Over time, mulch will break down and decompose. Replenish the mulch layer as it thins out to maintain its weed-suppressing and moisture-retaining benefits.
- Monitor Moisture Levels:
- Check the moisture levels beneath the mulch regularly. While mulch helps retain moisture, it's essential to ensure that the soil doesn't become overly dry or waterlogged.
- Mulch Throughout the Growing Season:
- Mulching isn't a one-time task. You can apply mulch around growing plants as they develop, providing ongoing benefits.
Conclusion
As we finish our vegetable soil and nutrient management practices and guide, remember that your garden is a canvas waiting for your artistic touch. We've covered ways to nurturing your successful garden.
Remember that vegetable crops grown with proper care and mamagement will create a sustainable garden. Your garden lets you enjoy nature and grow food from seed to table. Embrace your power and allow your garden to grow healthy food, feed your family, and help create a greener future.
Happy gardening!
