
Comprehensive Guide to Starting Seeds Indoors for Successful Seed Germination
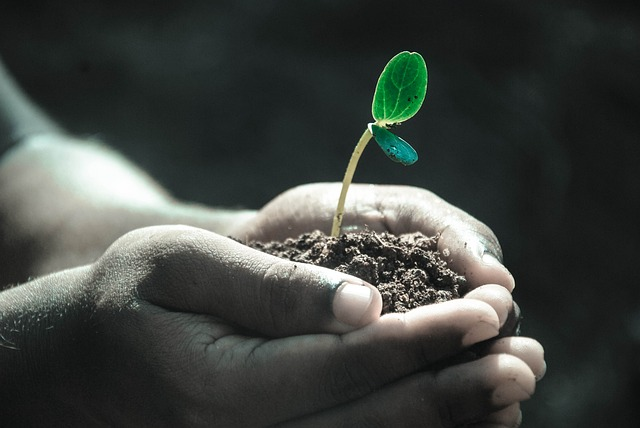
If you've ever dreamed of nurturing your own garden from the very beginning, this guide is your key to success. Starting seeds indoors not only extends your growing season but also gives you greater control over the early stages of plant development. Our guide will walk you through the essential steps to ensure your seeds sprouts, thrive, and blossom into a flourishing garden.
From choosing the right seeds to creating the ideal growing environment, we'll cover the essential steps to set you on the path to sowing seeds. Get ready to witness the wonder of tiny seeds transforming into robust seedlings, ready to be transplanted into your outdoor garden.
Let's dive in and unlock the secrets to nurturing life from the very beginning – because every successful garden starts with a tiny seed in the comfort of your home!
Benefits of When You Start Seeds Indoors
Before we will dive deeper let us take a look some benefits of starting seeds indoor
Seeds Germinate Quickly
When you start seeds indoors it provides a controlled environment that allows for faster germination and initial growth. Indoor conditions, such as temperature and moisture levels, can be optimized to suit the specific needs of each plant variety. This results in quicker and more uniform germination, giving your plants a head start in their development. With a jumpstart on growth, seedlings are better equipped to withstand potential challenges like pests and adverse weather conditions once they are transplanted outdoors.
Extended Growing Season
Sowing your own seedlings indoors extends the growing season and offers numerous benefits for gardening enthusiasts. By starting the germination process indoors, you gain a head start on the growing season, allowing your seedlings to establish robust root systems and develop sturdier stems before being transplanted outdoors. This advantage enables you to plant outdoors earlier than if you had directly sown seeds in the garden. Plus, with the ability to control indoor conditions, you can tailor the environment to suit the specific needs of your plants. This ensures a successful and flourishing transition when it's time to move your own plants into the great outdoors.
Greater Plant Variety Selection
Starting seeds indoors opens up a vast array of plant varieties for cultivation. Many unique and specialty plant varieties may not be readily available as mature plants at local nurseries. When you start seeds indoors, you gain access to a broader selection of seeds, allowing you to grow specific cultivars, heirloom varieties, or plants tailored to your taste and garden conditions. This diversity enhances the overall aesthetic appeal and variety of your garden, creating a more personalized and unique outdoor space.
Cost Savings
Growing plants from seeds indoors can be a cost-effective alternative to purchasing mature plants. Seeds are generally more affordable than fully grown seedlings, and by starting them indoors, you eliminate the need to buy established plants from nurseries. Additionally, cultivating your plants from the beginning allows you to use cost-efficient materials, such as seedling trays and potting mix, instead of investing in more expensive fully-grown specimens. This cost-saving aspect is particularly appealing for gardeners on a budget or those looking to maximize their gardening investments.
Customized Growing Conditions
Starting seeds indoors gives you precise control over the growing conditions, ensuring optimal development for each plant species. You can tailor factors such as light intensity, temperature, and humidity to match the specific requirements of different plants. This level of customization is especially beneficial for enthusiasts who want to experiment with a diverse range of plants or cultivate species that may not be well-suited to their local climate. By providing ideal conditions during the crucial early stages of growth, you set the foundation for healthier, more robust plants in the long run.
When to Begin Indoor Seed Starting
The timing for indoor seed starting is a critical factor that varies depending on the specific plant species and your local climate. Generally, it is determined by the average last frost date in your area and the recommended germination and growth periods for the plants you intend to cultivate. As a general guideline, indoor seed starting often begins 6-8 weeks before the anticipated last frost date.
Start by identifying the average last frost date for your region, which can typically be found through local agricultural extension services or gardening resources. Once you have this date, count backward on the calendar by the recommended number of weeks for each plant variety. For instance, if the last frost date is expected around mid-April and a particular plant requires 6 weeks of indoor growth, you would start the seeds around early March.
Keep in mind that some plants may require a longer or shorter duration of indoor growth, so refer to specific seed packets or gardening guides for accurate information. Additionally, factors like the maturity time of the plant and the desired size for transplanting should be considered.
In regions with unpredictable weather patterns, having a few weeks' flexibility in your indoor seed starting schedule is advisable. This ensures that your seedlings are robust and ready for transplantation when the outdoor conditions become favorable. Monitoring local weather forecasts and adjusting your indoor seed starting timeline accordingly will help you optimize the success of your gardening endeavors.
Supplies Needed to Start Seed Indoors
Starting seeds indoors requires a few essential supplies to create a conducive environment for successful germination and early growth. Here's a list of supplies you'll need:
Seed Starting Trays:
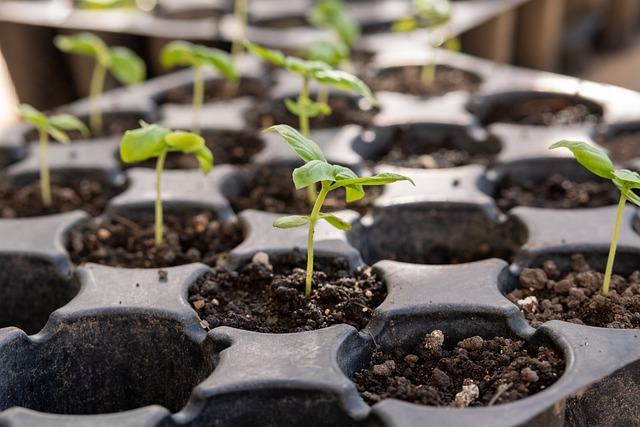
Choose trays or pots with good drainage to prevent waterlogging. This allows for better control over moisture levels and reduces the risk of seedlings succumbing to diseases.
Types of Seed Starting Trays or Pots
There are various types of seed starting trays and pots available to cater to different preferences and gardening needs. Here are some common types:
Plastic Seed Starter Trays:
Plastic seed starting trays are widely used for starting seeds indoors. They are lightweight, durable, and come in various cell configurations. These trays often have excellent drainage and are reusable, making them a practical choice for gardeners looking to start multiple seed varieties.
Biodegradable Seed Starting Trays:
These pots can be planted directly into the soil, reducing transplant shock for seedlings. Biodegradable Seedling Trays are made from compressed organic materials examples are peat pots, or coconut coir. They decompose over time, providing an eco-friendly option for environmentally conscious gardeners. They provide good aeration to the roots and are suitable for plants that are sensitive to root disturbance during transplanting.
Seed Starting Pods:
Seed starting inserts are small, individual cells typically arranged in larger trays. These inserts provide a convenient way to start seeds while keeping them separated. They are often made of plastic and are available in various cell counts, allowing for flexibility in seed starting.
Styrofoam Seed Starter Trays:
Styrofoam seed starting trays are lightweight and inexpensive. While they may not be as environmentally friendly as other options, they are often used for starting seeds on a larger scale. They can be reused if handled carefully.
Recycled or Upcycled Seed Starting Containers:
Gardeners often repurpose items like egg cartons, yogurt containers, or eggshells as seed starting containers. While these may not have the uniformity of commercial trays, they are cost-effective and environmentally friendly.
Seed Starting Container
Seed starting containers are essential for germinating seeds indoors before transplanting them to the garden. They provide a controlled environment for seedlings, allowing for proper moisture retention and temperature regulation. Seed starting containers help prevent transplant shock, giving seeds a healthy start and ensuring a successful transition from indoor germination to outdoor growth.
Seed Starting Mix:
Select a high-quality seed starting mix that provides the right balance of aeration and water retention. Avoid using regular garden soil, as it may compact and hinder seedling development.
Seeds:
There are many seeds out there so it is best to obtain high-quality seeds from reputable sources. Consider the specific needs of each plant variety, including light requirements, germination temperatures, and recommended indoor growing periods.
Grow Lights:
Grow lights are essential for starting indoor seeds, offering a controlled light source that mimics the sun's spectrum. Grow lights provide consistent illumination, ensuring optimal conditions for seed to germinate and early plant growth. There are many types of grow lights and LEDs (Light Emitting Diodes) are a popular choice for indoor gardening due to their energy efficiency, long lifespan, and the ability to produce the specific light wavelengths needed for plant photosynthesis.
Heat Mat :
For plants that require warmer soil temperatures for germination, a heat mat can be beneficial. This is particularly useful in cooler climates or during the early spring months.
Watering Can or Spray Bottle:
Use a watering can with a fine nozzle or a spray bottle to provide gentle moisture to the seedlings. Avoid overwatering, as it can lead to damping off and other issues.
Plant Labels:
Labeling your trays or pots with the plant variety and date of planting helps you keep track of each species and its growth progress. This is especially important when starting multiple types of seeds.
Ventilation:
Ensure proper air circulation around the seedlings by placing a small fan in the vicinity. This helps prevent fungal issues and encourages sturdy stem development.
Sterilized Tools:
Use clean and sterilized tools such as a hand trowel or dibber for handling seeds and transplanting seedlings. This minimizes the risk of introducing pathogens to the growing environment.
Drip Trays:
Place drip trays beneath seed trays or pots to collect excess water and prevent mess. This helps maintain a tidy and organized indoor growing space.
By gathering these supplies, you'll be well-prepared to start seeds indoors and set the stage for a successful and thriving garden.
How To Choose The Right Seeds
Choosing the right seeds is a crucial step in successful gardening. Here's a guide to help you make informed decisions when selecting seeds:
Consider Your Climate:
Choose seeds that are well-suited to your local climate. Some plants thrive in warm temperatures, while others are better suited to cooler climates. Check the hardiness zone and growing conditions recommended for each seed variety.
Determine Your Garden Space:
Assess the available space in your garden or containers. Some plants require more room to spread out, while others can be grown in smaller spaces. Consider the size of mature plants and plan accordingly.
Know Your Soil Type:
Understand the composition of your soil—whether it's sandy, loamy, or clayey. Different plants have preferences for specific soil types. Choose seeds that match the soil conditions in your garden or be prepared to amend the soil accordingly.

Sunlight Requirements:
Pay attention to the sunlight requirements of each plant. Some crops thrive in full sun, while others prefer partial or full shade. Ensure that your garden receives the necessary sunlight for the selected seed varieties.
Time to Maturity:
Consider the time it takes for plants to mature. Some crops, like radishes and lettuce, have a quick turnaround, while others, such as tomatoes or watermelons, take longer. Align the time to maturity with your gardening goals and the length of your growing season.
Choose Open-Pollinated or Hybrid Seeds:
Decide between open-pollinated and hybrid seeds. Open-pollinated seeds produce plants with characteristics similar to the parent plant and can be saved for future seasons. Hybrid seeds result from the crossbreeding of different varieties and often exhibit specific desirable traits.
Heirloom or Modern Varieties:
Choose between heirloom and modern varieties. Heirloom seeds are traditional, open-pollinated varieties passed down through generations, often prized for their unique flavors. Modern varieties may offer improved disease resistance or other benefits.
Consider Companion Planting:
Explore companion planting principles. Some plants grow well together and provide mutual benefits, such as deterring pests or enhancing each other's growth. Consider these relationships when choosing seeds for your garden.
Read Seed Packets:
Read the information on seed packet. Seed labels provide essential details such as planting depth, spacing, and care instructions. This information ensures that you meet the specific needs of each plant variety.
Seed Quality and Source:
Purchase seeds from reputable sources to ensure quality. Choose seeds that are not expired, and if possible, look for organic or non-GMO options. Reliable seed companies provide detailed information to help you make informed choices.
Personal Preferences:
Consider your preferences and gardening goals. Whether you prioritize growing vegetables, flowers, or herbs, align your seed choices with your interests and the overall vision you have for your garden.
How to Choose a Soil Medium for Seed Starting Indoors
Choosing the right potting mix for seeds is crucial for providing the optimal environment for germination and early seedling growth. Here are some key considerations to help you select the best potting mix for your seeds:
Well-Draining Composition:
Select a potting mix that offers excellent drainage. Seeds are susceptible to rot if they are consistently sitting in waterlogged soil. Look for mixes that contain materials like perlite, vermiculite, or coarse sand to ensure proper aeration and drainage.
Fine Texture:
Opt for a mix with a fine texture to provide a soft and loose environment for delicate seedlings to establish their roots easily. Avoid coarse mixes that may hinder the emergence of small seeds or cause damage to emerging roots.
Sterile and Disease-Free:
Ensure that the potting mix is sterile and free from diseases, pests, and weed seeds. Sterilized mixes help create a clean environment for your seeds, minimizing the risk of soil-borne issues that could harm germinating seeds and young seedlings.
Lightweight:
Lightweight mixes are easier for seedlings to push through as they emerge from the soil. Consider mixes that are not overly compact or heavy, providing a loose and airy structure that facilitates seedling growth.
Nutrient Levels:
Choose a potting mix with a balanced nutrient content specifically formulated for seed starting. While seeds initially rely on their internal nutrients, a gentle supply from the potting mix as the seedlings grow is beneficial. Avoid mixes with excessive fertilizers, as this can lead to overfeeding and harm delicate seedlings.
pH Balance:
Check the pH balance of the potting mix, aiming for a slightly acidic to neutral range. Most seeds and seedlings prefer a pH between 6.0 and 7.0. This ensures that essential nutrients are readily available for uptake by the plants.
Seed Starting Mixes vs. All-Purpose Mixes:
Seed starting mixes are specially formulated for the germination and early growth stages, often containing finer particles. While all-purpose mixes can be used, they may need amendments such as perlite to improve drainage and texture for optimal seedling development.
Moisture Retention:
Look for a mix with adequate moisture retention capabilities. While drainage is crucial, the mix should also retain enough moisture to prevent it from drying out too quickly. This helps ensure a consistent water supply for germinating seeds and young seedlings.
Readymade or Homemade:
You can choose between readymade seed starting mixes available at garden centers or create your own mix by combining components like peat moss, perlite, and vermiculite. Homemade mixes provide the flexibility to tailor the composition to your specific needs.
By considering these factors, you'll be able to select a potting mix that provides the ideal foundation for successful germination and healthy seedling growth. Always follow the specific recommendations for the plant varieties you are growing to ensure the best results.
Choosing The Right Seed Trays
Here are some considerations to help you make the best choice for seed starting:
1. Material:
Seed trays are commonly made of plastic or biodegradable materials. Plastic trays are durable, lightweight, and reusable, making them a practical choice for long-term use. Biodegradable options, often made from materials like peat or coconut coir, can be directly planted into the soil, reducing transplant shock for seedlings.
2. Cell Size:
Consider the size of the cells in the seed tray, which will determine the spacing and individual growth conditions for each seedling. Smaller cells are suitable for small seeds and plants that will be transplanted sooner, while larger cells accommodate larger seeds or plants with longer indoor growing periods.
3. Depth of Cells:
The depth of the cells should be sufficient to allow for proper root development. Deeper cells are advantageous for plants with longer root systems. Ensure that the depth is appropriate for the specific plant varieties you intend to grow.
4. Number of Cells:
Choose a seed tray with an appropriate number of cells based on the number of seeds you plan to sow and the available space for indoor gardening. Multiple trays can be used to accommodate different plant varieties or staggered planting times.
5. Tray Size:
Consider the overall size of the seed tray in relation to your available space and the number of seedlings you want to grow. Larger trays may be more efficient for handling multiple plants, while smaller trays are suitable for compact spaces or specific plant varieties.
6. Ventilation:
Some trays come with clear plastic lids or domes that provide a greenhouse effect. This helps maintain humidity and temperature levels conducive to germination. Ventilation features, such as adjustable vents or perforations, can be beneficial to prevent excessive humidity and encourage air circulation.
7. Durability:
Choose sturdy and durable, especially if you plan to reuse them for multiple growing seasons. Reinforced edges and high-quality materials contribute to the longevity of the trays.
8. Ease of Transplanting:
Seed starting trays with cells that are easy to remove or transplant can simplify the transition of seedlings to larger pots or directly into the garden. Flexible or biodegradable cells can be gently pushed out without disturbing the delicate roots.
9. Drainage Holes:
When selecting seed starting trays for successful germination the presence of drainage holes is paramount. Adequate drainage ensures that excess water doesn't accumulate, preventing potential issues like root rot and fungal diseases. Choose trays with a few drainage holes to create the perfect balance, allowing your seeds to germinate in a moisture-controlled environment.
10. Reusability:
Opt for seed starting containers that are designed for reuse. This not only reduces waste but also ensures a consistent and reliable container for future seed starting projects. (If starting plants with sensitive roots, you may want to opt for single use containers.)
Choosing the Right Location to Start Seed Indoors
Selecting the right location when growing seeds indoors is crucial for successful germination and healthy seedling development. Here's a guide to help you choose an optimal location:
Access to Direct Sunlight:
Choose a location with access to natural light, preferably near a south-facing window. Adequate sunlight is essential for strong seedling growth. If using artificial lights, ensure they are positioned at the correct distance and provide the necessary spectrum for photosynthesis.
Consistent Temperature:
Opt for a location with a consistent soil temperature range. Most seeds germinate well in temperatures between 65-75°F (18-24°C). Avoid extreme temperature fluctuations, as they can affect germination and seedling health.
Avoid Drafts:
Steer clear of drafty areas, as cold drafts can harm delicate seedlings. Choose a spot away from windows, doors, or vents that might expose the seedlings to fluctuating temperatures.
Proximity to Water Source:
Select a location close to a water source. Watering seedlings can be a frequent task, and having easy access to water simplifies the process and to keep the soil moist.
Space for Adequate Air Circulation:
Allow for adequate air circulation around the seedlings. Good airflow helps prevent issues like damping off and encourages sturdy stem development. Avoid overcrowding and ensure trays are not placed too close together.
Clean and Sterile Environment:
Ensure the chosen location is clean and sterile. Sterilize trays, pots, and the surrounding area to minimize the risk of diseases that can affect seedlings. A clean environment promotes healthier germination and growth.
Proximity to Gardening Supplies:
Keep your seed starting location close to essential gardening supplies, such as potting mix, watering cans, and labels. This convenience makes it easier to address the needs of your seedlings promptly.
Considerations for Artificial Lighting:
If using artificial lighting, choose a location where you can easily hang or set up the lights. Make sure the lights are adjustable in height to accommodate the varying growth stages of the seedlings.
Space for Expansion:
Plan for space expansion as seedlings grow. Ensure there is room for larger containers or trays as seedlings develop their roots and foliage. This prevents overcrowding and allows for seamless transplantation.
Reflective Surfaces:
Consider using reflective surfaces, such as white walls or foil-lined boards, to bounce light back onto the seedlings. This enhances the efficiency of natural or artificial light sources.
By carefully selecting the right location based on these considerations, you create an optimal environment for your seeds indoors, setting the stage for healthy and vigorous seedling growth.
Easy Steps to Sow Seedlings Indoors Successfully
Here are simple steps to successfully sow seeds indoors:
Prepare the Growing Medium:
Moisten the seed starting mix before planting to ensure even moisture throughout. Avoid making it overly wet, as excessively soggy conditions can lead to issues such as damping off.
Begin by filling your seed trays or pots with a high-quality seed starting mix. This mix provides a light and well-draining environment conducive to seed germination.
Read the Seed Packet:
Carefully read the information on the seed packet. This includes details about the recommended planting depth, spacing, and any specific germination requirements for the particular plant species.
Sow Your Seeds:
Plant seeds at the depth specified on the seed packet. Use a dibber or your fingertip to create small holes in the growing medium and gently place the seeds in the designated spots.
Label Your Newly Planted Seeds:
Label each tray or pot with the plant variety and the date of planting. This helps you keep track of different seeds and their germination progress.
Keep Your Seeds Moist and Warm:
Maintain a consistently moist environment by misting the surface or using a gentle watering can. To promote germination, ensure that the temperature remains within the optimal range specified for the seeds.
Give Your New Seedlings Light:
Once seeds have germinated, provide them with ample light. Place seed trays near a south-facing window or use artificial grow lights. Ensure that the light source is positioned close enough to prevent seedlings from becoming leggy.
Keep Seeds Warm and Humid:
To enhance germination, cover the trays or pots with a clear plastic lid or plastic wrap. This creates a humid environment that aids in seedling development. Once germination occurs, gradually remove the cover to acclimate seedlings to lower humidity levels.
Keep Seedlings Moist:
Continue to keep the growing medium consistently moist but not waterlogged. Water from the bottom to avoid disturbing delicate seedlings. Adjust watering frequency based on the moisture needs of the specific plant varieties.
Begin Feeding:
Once seedlings develop their first set of true leaves, start feeding them with a diluted, balanced liquid fertilizer. Follow the recommended application rates on the fertilizer packaging.
How to Soak Seeds to Speed Up Germination Time
Soaking seeds before planting is a technique that can help seeds germinate quickly by initiating the hydration process and softening the seed coat. Here's a step-by-step guide on how to soak seeds to enhance germination time:
I. Prepare Your Seeds:
Start by examining the seeds you intend to sow. Some seeds benefit from soaking more than others, particularly those with hard outer coatings. Sorting and selecting seeds at this stage contribute to a more efficient soaking process, ensuring that you focus on seeds that will gain the most advantage.
II. Gather Materials:
Before starting the soaking process, gather all the necessary materials. You'll need clean containers, room temperature or lukewarm water, and optionally, a paper towel. Having everything ready streamlines the process and ensures you can seamlessly move through each step.
III. Prepare Water:
Use room temperature or lukewarm water for soaking seeds. Avoid using hot water, as it may damage the seeds. Measuring the water to cover the seeds adequately ensures that they receive the right amount of hydration without being excessively submerged.
IV. Soaking Time:
The soaking time varies based on the seed type. Typically, a soaking duration of 4 to 12 hours is sufficient. Larger seeds may require longer soaking periods. Timing is crucial, so consulting specific recommendations for each seed variety ensures you achieve the optimum soaking duration.
V. Use a Paper Towel (Optional):
Placing seeds on a damp paper towel or cloth during soaking helps prevent them from sticking together. This optional step aids in maintaining proper spacing and ensures that each seed receives individual attention during the soaking process.
VI. Drain Excess Water:
After the designated soaking period, drain excess water from the container. Using a sieve or fine mesh strainer helps separate the seeds from the water. This step ensures that seeds are not left in waterlogged conditions, preventing potential issues like rot.
VII. Plant Immediately:
Once the seeds have soaked, plant them immediately. The softened seed coat allows for easier penetration of moisture, promoting quicker germination. Immediate planting ensures that the seeds benefit from the enhanced hydration provided during the soaking process.
VIII. Planting Depth:
Plant the seeds at the recommended depth specified on the seed packet. This step ensures that the seeds are positioned optimally for successful germination. Proper planting depth is essential for the subsequent stages of seedling development.
IX. Provide Ideal Conditions:
Maintain ideal conditions for germination after planting. This includes ensuring the right temperature, humidity, and light levels. The combination of soaked seeds and suitable growing conditions sets the stage for robust and healthy germination.
X. Monitor Germination:
Keep a close eye on the germination progress. Soaking seeds typically leads to quicker and more uniform germination. Monitoring the emergence of seedlings allows you to adjust care practices as needed and ensures a successful transition from soaking until the seeds sprout.
By following these steps, you can effectively employ the soaking technique to enhance the germination time of your seeds, promoting a healthy and vigorous start for your plants.
Here are some plants that benefit from soaking their seeds:
-
Peas (Pisum sativum): Soaking pea seeds helps to soften their outer coating, leading to quicker sprouting.
-
Okra (Abelmoschus esculentus): Okra seeds have a hard shell and benefit from soaking for easier germination.
-
Beets (Beta vulgaris): Beet seeds, which are actually clusters of multiple seeds, can benefit from soaking for more uniform germination.
-
Chard (Beta vulgaris subsp. vulgaris): Similar to beets, chard seeds can also be soaked for better germination rates.
-
Parsley (Petroselinum crispum): Parsley seeds have a notoriously long germination period, which soaking can help shorten.
-
Carrots (Daucus carota subsp. sativus): Soaking can aid in the germination of carrot seeds, which are typically small and slow to germinate.
-
Pumpkins and Squashes (Cucurbita spp.): The hard seeds of pumpkins and squashes germinate more readily after soaking.
-
Cucumbers (Cucumis sativus): Soaking cucumber seeds can lead to faster and more even germination.
-
Melons (Cucumis melo): Like other members of the cucurbit family, melons can benefit from pre-soaking.
-
Morning Glory (Ipomoea spp.): These seeds have a hard coat and benefit from being soaked or even lightly filed before planting to aid water absorption.
-
Sweet Peas: Sweet pea seeds germinate more effectively after soaking due to their hard outer coating.
-
Beans: Soaking bean seeds before planting can significantly speed up germination.
How to Properly Transplant Seedlings
Timing is Key:
Choose the right time for transplanting seedlings. Seedlings should be mature enough to handle the stress of transplantation but not so mature that their roots are overly entangled. Follow the recommended transplanting time for each plant species.
Prepare the New Growing Site:
Ensure that the new growing site, whether it's in your garden or larger containers, is prepared and ready. The soil should be well-draining, and the area should receive the appropriate amount of sunlight for the specific plants.
Hardening Off
Hardening off is a crucial step in the process of properly transplanting seedlings outdoors. Hardening off involves gradually acclimating your young plants to the external environment, toughening them up for the challenges beyond the safety of indoor conditions. By exposing seedlings to increasing amounts of natural light, wind, and fluctuating temperatures over a specified hardening off period, you ensure they become resilient and adaptable. Skipping this step may lead to weak plants that will unable to withstand the outdoor stresses, while a well-executed hardening off routine produces robust and healthy plants, ready to thrive in the garden.
Watering Before Transplanting:
Water the seedlings thoroughly a few hours before transplanting. This helps the soil hold together around the roots, reducing the risk of transplant shock.
Gently Remove Seedlings:
Carefully remove the seedlings from their original containers. To avoid damaging the delicate roots, use a spoon, dibber, or your fingers to gently loosen the soil around the root ball.
Handle Seedlings Carefully:
Hold seedlings by their leaves rather than the delicate stems to prevent damage. The leaves can recover from minor stress, but stem damage can be detrimental to the plant.
Dig Planting Holes:
Dig holes in the new growing site that are large enough to accommodate the root system of each seedling. Space the holes according to the recommended planting distance for each plant variety.
Plant at the Right Depth:
Plant seedlings at the same depth they were in their original containers. Ensure that the soil is snug around the roots, but avoid compacting it excessively.
Water After Transplanting:
Immediately after transplanting, water the seedlings well. This helps settle the soil around the roots and reduces transplant shock. Watering also ensures that the plants have access to moisture as they adjust to their new environment.
Protect Seedlings from Stress:
Minimize stress on the seedlings during transplanting by doing it during a cool part of the day, ideally in the late afternoon or on a cloudy day. This reduces the risk of wilting and sunburn.
Provide Post-Transplant Care:
Continue to monitor and care for the transplanted seedlings. Keep the soil consistently moist, protect them from extreme weather conditions, and gradually introduce them to direct sunlight if they were started indoors.
Mulch and Fertilize (if needed):
Mulching around the base of the seedlings can help retain moisture and suppress weeds. Depending on the plants and soil conditions, consider adding a balanced fertilizer to support their growth.
Monitor and Adjust:
Keep an eye on the transplanted seedlings in the following days and weeks. Watch for signs of stress, pests, or diseases, and make any necessary adjustments to ensure their successful establishment.
Common Mistakes to Avoid When Sowing Seeds Indoors
Avoiding common mistakes ensures a successful seed-starting experience. Here are some mistakes to steer clear of:
Using the Wrong Seed Starter Mix:
Using regular garden soil or poor quality potting soil can lead to issues like poor drainage and compaction. Invest in a sterile seed starting mix that provides the right balance of aeration and moisture retention.
Overwatering or Underwatering:
Finding the right balance with watering is crucial. Overwatering can lead to damping off and other fungal issues, while underwatering can result in stunted growth. Water consistently, keeping the soil moist evenly so that vegetable seeds or flower seeds will grow properly.
Ignoring Seed Depth Guidelines:
Planting seeds too deep or too shallow can affect germination. Follow the guidelines on the seed packet regarding the appropriate planting depth for each type of seed. Proper depth ensures seeds receive the right amount of light and moisture.
Skipping Labeling:
Neglecting to label your trays or pots can lead to confusion. Differentiating between seed varieties becomes challenging as they germinate. Label each tray or pot with the plant variety and the date of planting to stay organized.
Not Providing Adequate Light:
Insufficient light is a common mistake when sowing seeds indoors. All the seeds needs light to germinate. If natural light is not available, invest in appropriate grow lights. Position the lights at the right distance from the seedlings to prevent them from becoming leggy.
Sowing Seeds Too Early or Too Late:
Timing is crucial when starting seeds indoors. Sowing seeds too early can lead to leggy, overgrown seedlings, while starting too late may result in stunted growth. Refer to the seed packet or local gardening guidelines for the ideal sowing times.
Neglecting Temperature Control:
Optimal soil temperature ensure that the indoor environment remains within the recommended temperature range for each seed variety. Cold temperatures can slow germination, while excessive heat can harm delicate seedlings.
Ignoring Seed Spacing:
Overcrowding seedlings can lead to competition for resources, resulting in weaker plants. Follow the recommended spacing guidelines on the seed packet and thin seedlings when necessary to provide adequate room for growth.
Forgetting Humidity Control:
Proper humidity is essential, especially during the germination stage. Using a humidity dome or covering trays with plastic wrap helps create a humid microclimate, enhancing germination rates. However, it's important to gradually reduce humidity as seedlings grow.
Skipping Transplanting:
Seedlings can outgrow their containers quickly. Skipping the transplanting step can lead to root-bound seedlings with restricted growth. Transplant seedlings into larger containers when they have developed their first true leaves if necessary.
Ignoring Air Circulation:
Lack of air circulation can contribute to fungal diseases. Use a small fan to provide gentle air movement around the seedlings. This helps strengthen stems and minimizes the risk of damping off.
Overlooking Hardening Off:
Hardening off is the process of acclimating seedlings to outdoor conditions before transplanting. Skipping this step can shock seedlings, impacting their ability to thrive in the garden. Gradually expose seedlings to outdoor conditions over a week before transplanting.
Conclusion
You've now unlocked the secrets to successful starting seeds indoors , and soon your indoor space will transform into a vibrant garden of possibilities. As you embark on this horticultural adventure, remember that every sprout is a testament to your dedication and the wonders of nature.
But our journey doesn't end here. Your newfound knowledge is the foundation for an ongoing relationship with your plants. It's time to put your knowledge into action! Grab your gardening tools, select your favorite seeds, and let the planting begin. Let's grow together!
We'd love to hear about your experiences and successes. Drop us a comment below and share your journey with the community. Remember, your thriving garden starts with that first tiny seed and your passion to make it grow.
Happy gardening, and may your indoor oasis flourish with the beauty of nature!
FAQs
-
Q: What are the benefits of starting seeds indoors?
A: Starting seeds indoors extends the growing season, provides control over early plant development, allows for a greater variety of plants, is cost-effective, and offers customized growing conditions. -
Q: When should I start seeds indoors?
A: Begin 6-8 weeks before the last frost date. The exact timing depends on plant species and local climate. -
Q: What supplies are needed for starting seeds indoors?
A: Essential supplies include seed starting trays, seed starting mix, high-quality seeds, grow lights, a heat mat, a watering can or spray bottle, plant labels, and proper ventilation. -
Q: How do I choose the right seeds for indoor starting?
A: Consider your local climate, garden space, soil type, sunlight requirements, time to maturity, and personal preferences. Opt for seeds well-suited to your conditions. -
Q: What's the best way to transplant seedlings outdoors?
A: Transplant when seedlings are mature enough, prepare the new site, water before transplanting, handle seedlings carefully, and harden them off to outdoor conditions.