
Are you sick of getting a painful back and muscles from working in your garden for hours? With the groundbreaking method of No Dig Gardening, organic farming has never been easier. Imagine yourself cultivating an organic garden that is both beautiful and fruitful without the need for laborious digging.
Gardening without digging protects the environment and fosters a healthy ecology. Preserving the soil's delicate structure allows beneficial creatures and plants to thrive. The foundation of an organic garden's success is nutrient-rich, healthy soil.
This extensive guide will disclose the no-dig gardening secrets for organic crops. This concept is game-changing for experienced gardeners looking to simplify their technique and newcomers looking to go on a green adventure.
Learn about No Dig Gardening and how to develop a beautiful, lucrative garden without blisters or back pain. Together, we'll create a beautiful, productive, and kind garden for both you and the Earth.
What Is No Dig Gardening Method?
No-dig gardening (“no till gardening”) makes developing and maintaining beds easy without turning or tilling the soil. The goal of this method is to avoid soil disturbance. Digging and tilling destroy sensitive soil structures, expose dormant weed seeds, and kills beneficial organisms.
Gardening without digging has been around for generations. However, it has become popular in the past decade. This approach has evolved into several versions. You may have heard of “sheet mulching”, “layered gardening”, or “lasagna gardening“.
Each of those is a no-till method, requiring no digging or tilling. These methods can be used in vegetable plots , perennial and annual beds, raised beds, walks, and walkways. The no dig gardening method unlocks natural soil fertility by unleashing the full power of beneficial soil microbes. Using the till gardening method you risk killing larger species and harming the ecology that your personal soil food web has been constructing.
Benefits Of No Dig Gardening
Here are some of the key advantages:
1. Improved Soil Health and Structure:
The layers of organic material, compost, and leaf mulch added in No Dig Gardening gradually break down, enhancing soil structure. This leads to better water retention, aeration, and drainage, creating an optimal environment for plant root development.

2. Reduced Soil Erosion:
Traditional gardening methods involving tilling can lead to soil erosion, especially on sloped terrain. No-dig gardening helps mitigate this issue by maintaining the soil structure, reducing the risk of erosion caused by wind and water.
3. Weed Suppression:
The use of cardboard or newspaper as a base layer in No Dig Gardening effectively suppresses weed growth by blocking sunlight and preventing weeds from establishing themselves. This reduces the need for frequent weeding, saving both time and effort.
4. No Dig Garden Reduced Water Usage:
The mulch layer in No Dig gardens helps retain soil moisture by minimizing evaporation. This means you'll need to water your garden less frequently, leading to water conservation and lower water bills.
5. Less Physical Strain:
No Dig Gardening eliminates the need for strenuous digging, saving your back and muscles from unnecessary strain. This makes gardening accessible to people of various ages and physical abilities.
6. Soil Fertility Enhancement:
The continuous addition of compost and organic matter as soil amendments gradually enriches the soil with nutrients. This slow release fertilizer enhances plant growth and reduces the reliance on synthetic fertilizers, promoting a more sustainable and eco-friendly garden.
7. Biodiversity Promotion:
The undisturbed native soil in No Dig gardens supports a diverse range of beneficial soil organisms, including earthworms, beneficial insects, and microorganisms. This biodiversity contributes to a healthier garden with natural pest control and improved overall resilience.
8. Lower Maintenance Requirements:
No Dig gardens tend to have fewer weeds problems, which means less time spent on weed control. Additionally, the gradual decomposition of organic matter reduces the need for constant fertilization, resulting in lower maintenance demands.
9. Enhanced Carbon Sequestration:
The organic matter integrated into No Dig gardens captures carbon from the atmosphere and stores it in the soil. This contributes to mitigating climate change by reducing atmospheric carbon dioxide levels.
10. No Dig Garden is a Sustainable Approach:
No Dig Gardening aligns with organic and sustainable gardening practices, promoting a more harmonious relationship between humans and nature. By working with the natural processes of the soil life, you contribute to healthier ecosystems and a greener planet.
How To Make A No Dig Garden Bed?
1. Choose the Location for Your No Dig Bed
Select a suitable spot for your no till garden bed. Anywhere in your previous garden space. Make sure there is enough sunlight.
2. Gather Materials
Collect the necessary materials for your No Dig Garden Bed, including cardboard, newspaper, compost, leaf mold, chicken manure, mulch, grass clippings, shredded leaves, green manure or cover crop, or other organic matter. You may need a lawn mower, or garden edging, but these are optional.

3. Clean the Area
Remove any existing vegetation, weeds, or debris from the chosen location. You can mow the area short or trim down any overgrown plants.
4. Cover the Garden Beds
Cover the entire ground with thick cardboard. This will suffocate and kill the vegetation. If you don't have any cardboard, a thick layer of newspaper (6-10 sheets thick) could suffice. Newspaper is great because it breaks down into the soil when damp and plant roots penetrate it. Overlap the pieces so that every inch of ground is covered and there are no gaps for weeds to enter. You can also use a weed barrier underneath to ensure the weeds will not grow.
5. Wet Everything
Spray water over your foundation layer until it is completely moist. This will protect it from blowing away and will soften the cardboard, allowing it to adhere to the ground.
6. Layer on the compost -
Place a thick layer of organic matter on top of the cardboard, such as compost, rotten manure, peat moss, or worm castings. The goal is to stop all light from reaching the weeds and grass below. The organic stuff will also moisten the cardboard, smothering weeds faster. To achieve optimal results, ensure your compost layer is at least 4-6" deep to prevent light penetration and maintain moisture levels.
7. Keep It Hydrated
To succeed with no-dig gardening, it is crucial to water the raised bed regularly. Watering the thick top layer softens the cardboard layer and retains moisture. When cardboard dries out, it stays firm and breaks down slower. That can hinder plant growth. But if you keep it hydrated, the cardboard will break down quickly under all that wet mulch and compost.
8. Cover With Mulch
If you don't like how the plain compost looks, cover it with a layer of traditional mulch, such as weed-free straw or shredded wood. This will help to retain even more moisture while preventing weeds growing. This is an optional step so that you may avoid it.

9. Plant Your Garden
The nicest part about no-dig gardening is that you don't have to wait for your beds to be ready to go. The cardboard will be soft enough by the time the roots reach it that they will grow right through it and into the soil beneath. This is why a thicker compost or layer of compost is preferable. You do not want to make any holes in the cardboard. Weeds and grass will grow through if you do this.
Types of No-dig Gardens
A no-till garden reduces soil surface disturbance, maintains moisture, and promotes healthy ecosystems. Here are five different types of no-till gardens that provide different benefits and appeal to different gardening preferences:
Lasagna Gardening
Lasagna gardening, also known as sheet composting, is a technique that involves layering organic matters such as cardboard, newspaper, homemade compost, leaves, and straw. This method, perfect for novices, generates a nutrient-rich environment as the layers break down over time. Lasagna gardens are versatile and effective since they may be modified to any size and shape.
Back to Eden Gardening
Back in Eden gardening is modeled around natural forest ecosystems. Wood chips, dead plants or other organic mulch are put over the soil to simulate the forest floor. As they lay on the surface, dead plant matter gets invaded by bacteria and fungi. These beneficial microbes begin to convert the organic matter into humus, or natural compost. As they decompose, they conserve moisture, reduce weed development, and enrich the soil. Back to Eden gardens demand less watering and offer a long-term solution for small and large-scale horticulture.
Hugelkultur Garden
Hugelkultur garden are made by layering logs, branches, and organic matter such as leaves and compost to create raised beds. As the wood decomposes, it releases nutrients while retaining moisture, making it ideal for arid conditions. These beds have a distinct appearance and serve as a habitat for beneficial insects.
Straw Bale Gardening
Straw bale gardening is a unique method of growing plants directly on straw bales. The bales serve as both a growth medium and a reservoir for water. This approach is especially beneficial in locations with poor soil quality. Straw bales warm up more quickly in the spring, extending the growing season. It's an excellent choice for those with restricted space or physical restrictions.

Keyhole Gardens
Keyhole gardens are designed to use available space and resources best. These gardens, which seem like a keyhole from above, have a central composting basket that feeds the surrounding plants. They frequently contain recycled materials and comprise both kitchen and garden garbage. Keyhole gardens are appropriate for areas with restricted water supply.
Tips for Maintaining a No-dig Garden
A No-Dig Garden demands a different strategy than regular gardening. Follow these strategies to keep your garden healthy and productive without extensive digging:
1. Layering and Add Compost:
As you maintain your garden, periodically add layers of compost, well-rotted manure, or other organic material on top of the existing layers. Compost provides garden soil with a continuous source of nutrients, encourages beneficial microbial activity, and contributes to overall soil fertility.
2. Regular Mulching:
Add a layer of mulch over the surface of your garden bed. This helps retain moisture, suppress weed growth, and gradually breaks down to enrich the soil with organic matter.
3. Weed Management:
While No-Dig Gardens tend to have fewer weeds, some may still emerge. Pull out few weeds when you notice them growing to prevent them from establishing and competing with your garden plants.
4. Pest Control:
Encourage natural predators such as ladybugs, lacewings, and birds to control pests. Additionally, diverse plantings and a healthy ecosystem help create a balance where pest issues are less likely to become severe.

5. Monitor Soil Moisture:
Check the moisture levels in your garden bed regularly. No-Dig Gardens typically require less frequent watering due to the moisture-retaining properties of mulch and organic layers.
6. Observe and Learn:
Pay attention to how your garden responds to different practices and conditions. Over time, you'll develop a deeper understanding of your garden's needs and how to optimize its productivity. No-till gardening is a holistic approach that emphasizes soil health and ecosystem balance. The soil may take some time to mature and reach its optimum state fully, but the results will be well worth the wait.
Planting Vegetables in a No-Dig Garden
Embracing the no-dig approach is sustainable and creates an environment for plants to thrive effortlessly. Here are 10 easy-to-grow vegetables for your no-dig garden.
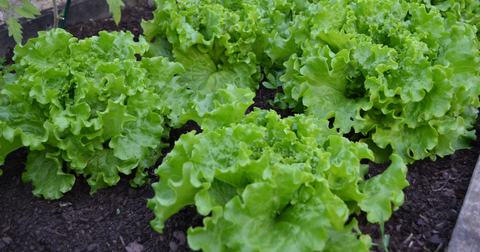
1. Lettuce:
Planting Season: Spring and Autumn.
Lettuce is a cool-season crop that thrives in well-drained compost. Sow the seeds directly, spacing them about a finger's width apart. Gently press them into the soil and lightly water them. As they grow, ensure consistent moisture. You'll enjoy crisp, fresh salads in no time!
2. Radishes:
Planting Season: Spring and Autumn.
Radishes are speedy growers! Sow them directly into the garden, placing seeds about an inch apart. Water moderately but consistently. Within a month, you'll be crunching on these peppery delights. Remember to harvest when they're young for the best flavor.
3. Green Beans:
Planting Season: Late Spring to Early Summer.
Beans are both delicious and beneficial, fixing nitrogen in the soil. Poke the seeds about an inch deep, spaced several inches apart. Water them in a well. They appreciate a little support as they grow, so consider adding some stakes or netting.
4. Spinach:
Planting Season: Spring and Autumn.
This nutrient-packed green prefers cooler temperatures. Sow seeds directly, spacing them a couple of inches apart. Keep the soil moist, especially during germination. Harvest leaves from the outside to let the plant continue producing.
5. Tomatoes:
Planting Season: Late Spring (after last frost).
Tomatoes, a garden favorite, start best from young plants or seedlings. Dig a deep hole and plant them up to their first set of leaves. This encourages a strong root system. Stake them early, and water consistently, avoiding wetting the leaves.
6. Zucchini:
Planting Season: Late Spring to Early Summer.
Zucchini plants love sun and well-draining compost. Plant seeds about an inch deep, with a foot or more between them. They're prolific, so get ready for a bountiful harvest! Keep an eye out for their large yellow flowers.

7. Peas:
Planting Season: Spring and Autumn.
Peas love the cool season and climb naturally. Sow seeds a few inches apart and a couple of inches deep. Provide some trellis or netting for support. As they grow, water consistently, and you'll be rewarded with sweet, juicy pods.
8. Carrots:
Planting Season: Spring to Mid-Summer.
Carrots need fine compost without large chunks. Directly sow the seeds, spacing them an inch apart. Thin out weaker seedlings as they grow. Ensure consistent moisture; in a few months, you'll unearth colorful, sweet roots.
9. Bell Peppers:
Planting Season: Late Spring to Early Summer.
Start with young plants, planting them about a foot apart. They prefer warm conditions and well-draining soil. Water them in well after planting and maintain consistent moisture. As they mature, support might be needed due to the weight of the fruit.
10. Kale:
Planting Season: Spring and Autumn.
Kale is resilient and nutrient-dense. Sow seeds directly spaced a few inches apart. Water them well, and as they grow, ensure consistent moisture. You can start harvesting when leaves are the size of your hand, picking from the bottom up.

For additional vegetable planting guide please check this our easy to grow vegetables and more information.
Succession Planting in a No-Dig Garden
Here's how to master succession planting in just three easy steps:
- Planning and Crop Selection: Begin by charting your garden space and deciding on the vegetables you wish to grow. Consider crops with varying maturation times. Choose fast-maturing crops for more efficient succession planting. Opting for a mix of different maturity lengths allows you to replenish and rotate your garden beds effectively, ensuring a constant yield.
- Staggered Planting: Stagger the planting dates rather than sowing or planting all seedlings at once. Every couple of weeks, sow a new batch. This ensures crops mature at different times, providing a steady flow of fresh produce. Choose plants that are well-suited for succession planting. Opt for a mixture of root vegetables, leafy greens, and herbs to maintain soil balance.
- Efficient Transitions: Once you've harvested a crop, prepare the space for the next immediately. In a no-dig garden, this is simplified. Remove the old plants, leaving the roots to decompose, and add to the soil structure. Then, add a layer of compost to refresh the soil surface. Now, it's ready for the next round of planting.
Conclusion
In conclusion, no dig gardening method guarantees a plentiful crop and a sustainable and peaceful connection with nature. Avoiding rigorous digging saves you from blisters and back strain and nurtures your garden's soil.
Invite friends, family, and neighbors to join you on this joyful path to No Dig Gardening. Share your stories, share tips, and marvel at what happens when we sync with the earth's rhythms.
Share your garden to inspire others. We can green and harmonize the earth one No Dig garden at a time. Happy gardening, and may your No Dig adventure bring growth plant health, joy, and the pleasures of an organic paradise!
FAQs
Can i create a no-dig garden on clay soil?
Regardless of its quality, you may create a no-dig garden over heavy clay soil or any other type of soil.
How long does cardboard take to decompose in a no-dig garden?
In a garden, cardboard decomposes quickly under certain conditions. A few months are enough to eliminate cardboard. Always keep it moist and covered in organic materials. Uncovered or dry components break down slower.
When is it okay to start planting seeds in a no-dig garden?
That's exactly why a no-dig garden is so appealing. You can start planting immediately, and your plants will thrive all season on the layers of decomposing organic materials.
What should the depth of a no-dig garden be?
A garden bed should be at least 12 inches deep to accommodate all of the layers of the no-dig method. Or even a bit more as it will naturally shrink as seasons pass.


Share and get 15% off!
Simply share this product on one of the following social networks and you will unlock 15% off!